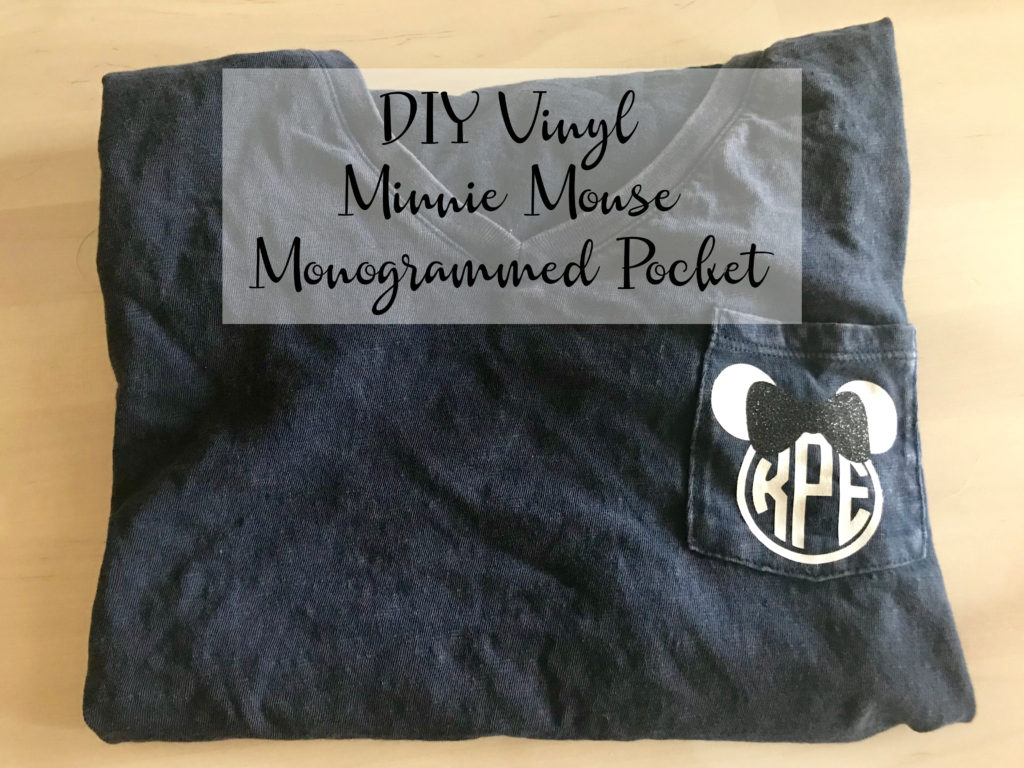
 Disney monograms are kinda my jam. I’m a big Disney fan. That’s probably an understatement, I basically live and breath Minnie Mouse and go to my favorite mouse house, Walt Disney World, as often as I can (like once a month or more). I buy plenty of Disney merch, but I love to customize and create my own. This monogrammed pocket shirt is perfect for your next Disney trip or everyday life if you are like me.
*This post contains affiliate links. We will be compensated if you make a purchase using these links. It simply helps keep this blog going.*
Supplies Needed:
- Cricut or similar die cut machine – Cricut Explore Air™ 2
- Circle Monogram SVG Cut File – I own this file, but originally purchased off Etsy
- Cricut Design Space
- HTV Vinyl – Purchased from Expressions Vinyl
- Colors I used: White Stretch HTV and Black Glitter HTV
- Cricut Cutting Mat
- Cricut Weeding Tools
- Transfer Tape – Expressions Vinyl
- Shirt – Navy distressed T-shirt from Target
I love a deal!
If you are not a fan of Cricut or want to get a comparison price on other machines? Check out the *Expressions Vinyl Cameo 3 Bundle to compare.
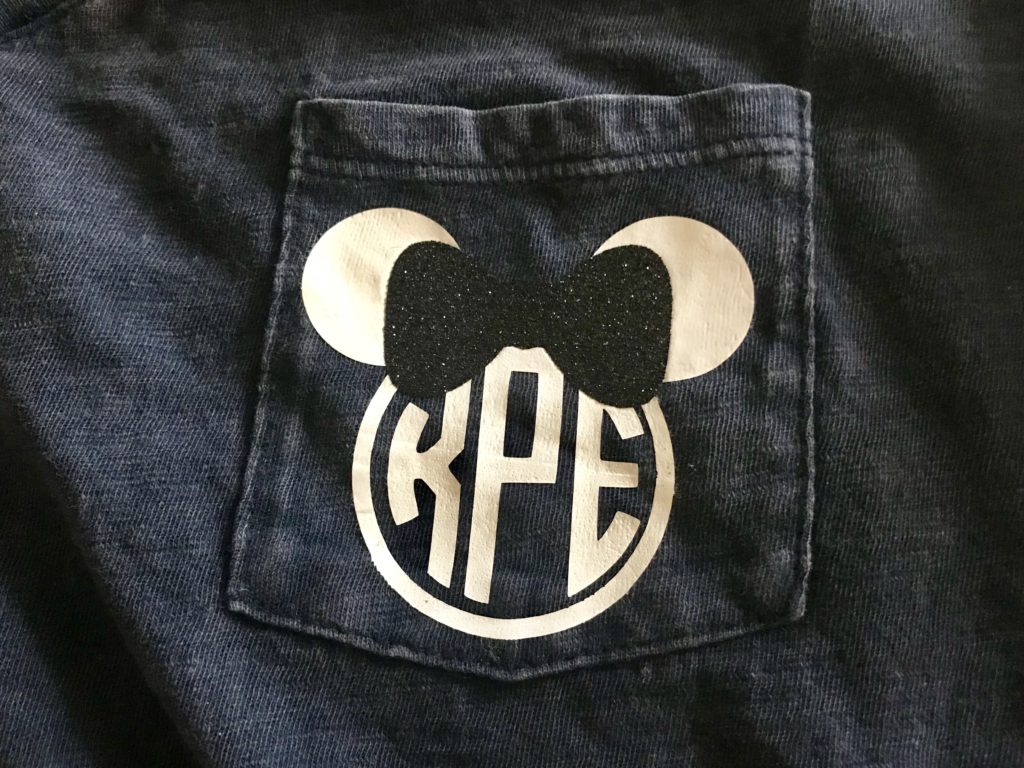
Monogram Minnie Ears With Bow
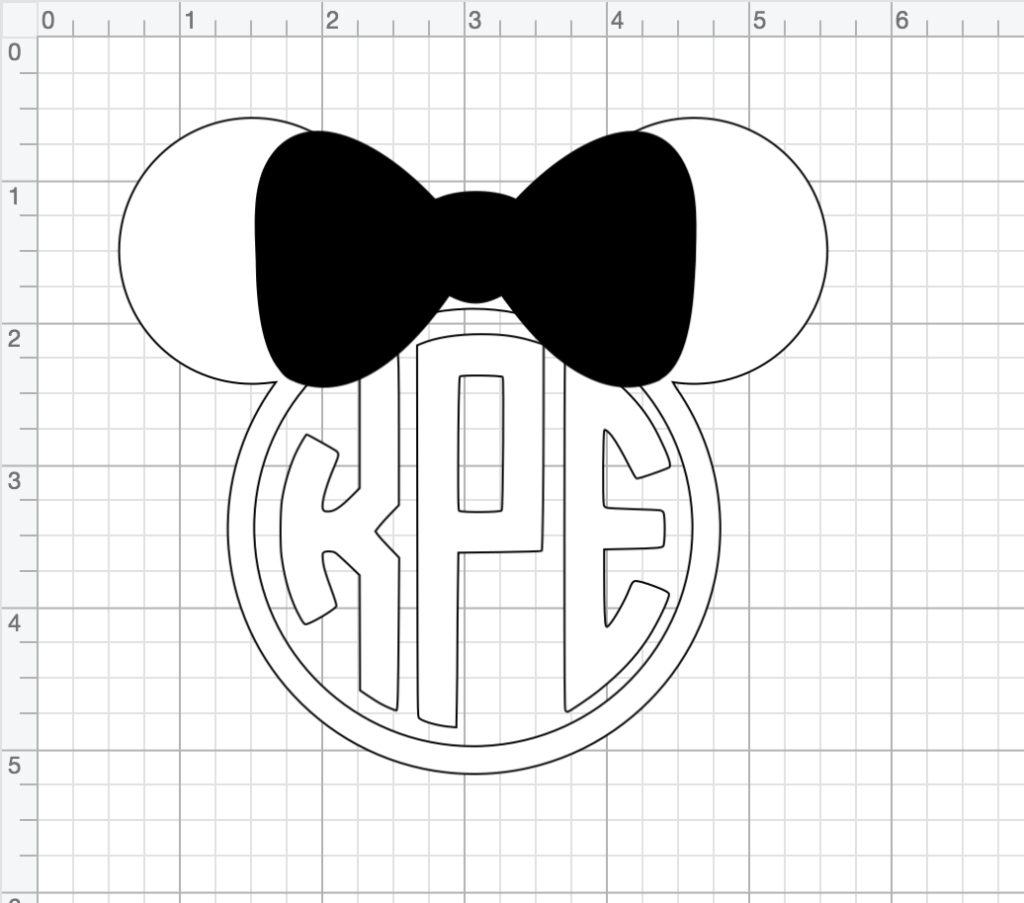
- Start by adding four circles to a blank Cricut Design Space project.
- Move three of the four circles to form a mouse head.
- Select and resize the two top circles to make ears and resize them to make the shape you like.
- Align the two ear circles so they are centered with one another.
- Place the two ear circles above the mouse head circle and line everything up in the way you’d like it.
- Take the fourth circle and resize it, so that it is just slightly smaller than the mouse head circle to create the outer circle line.
- Select all four circles and click on the SLICE button on the top right corner of your design space.
- Delete everything, except your two mouse ears and mouse head. (You should be left with a circle cut out of a large circle and two smaller partial circles.)
- Select everything and click the WELD button to attach them together. It should look like a mouse head with an empty center.
- Measure your pocket and resize the entire image to fit just smaller then the pocket.
- Next click insert image and find a bow you like out of the free to use images.
- Add your selection to your project and resize the bow to fit inside the center of the two “ears”.
- Place it over the Minnie head and center.
Adding Your Monogram
- Click on add images and select your circle font letters. (Circle fonts usually come in individual letter images and not as actual fonts. You will need to add each letter individually.)
- Use the align button to align the letters correctly
- Attach the letters together to make them a set.
- Resize the monogram to fit inside your head circle.
- Place the letters underneath your Minnie head design and align them correctly so everything is centered.
- Select the head design and your monogram design only and attach them to make them set. You want the head and the monogram to cut at one time and the bow to cut separately.
Cutting and Assembling
- Place your HTV shiny side down on a cutting mat.
- Set your die cut machine to cut vinyl.
- On your Cricut design space or design, program click GO to move to the cut screen.
- Make sure your image is set to MIRROR on your computer screen. You must do this in order to cut HTV or the word will be backwards when you apply it.
- Click cut on the computer and load your mat into your machine per instructions on the computer.
- When you are ready to cut, press the cut button on your machine.
- Once it’s finished cutting, remove the mat and load your next mat and repeat the process above to cut the second design.
- Preheat your iron to 325°F for Expression Vinyl Glitter HTV. Do not use steam! I use setting 5 on my iron since it doesn’t give degrees.
- Using any tools necessary to weed the excess HTV and middles of your word from the clear carrier sheet. Cut away the excess vinyl as remove it. You want only the word left on the clear carrier sheet.
- Lay out your onesie on a flat surface to iron on and preheat the onesie with the iron for 3 seconds.
- Place the word on top of the onesie where you want the finished product to sit and press them down firmly.
- Use a Heat Transfer Cover Sheet to cover the clear carrier sheet to act as an extra barrier from the iron. (I’ve also used a bed sheet or pillowcase)
- Take your iron and apply firm pressure on top of the clear carrier sheet at 325°F for 10-15 seconds. NO STEAM
- Peel the carrier sheet off the pillow while it is HOT. If the letters do not look like they are sticking as you pull off the backing, repeat step 13.
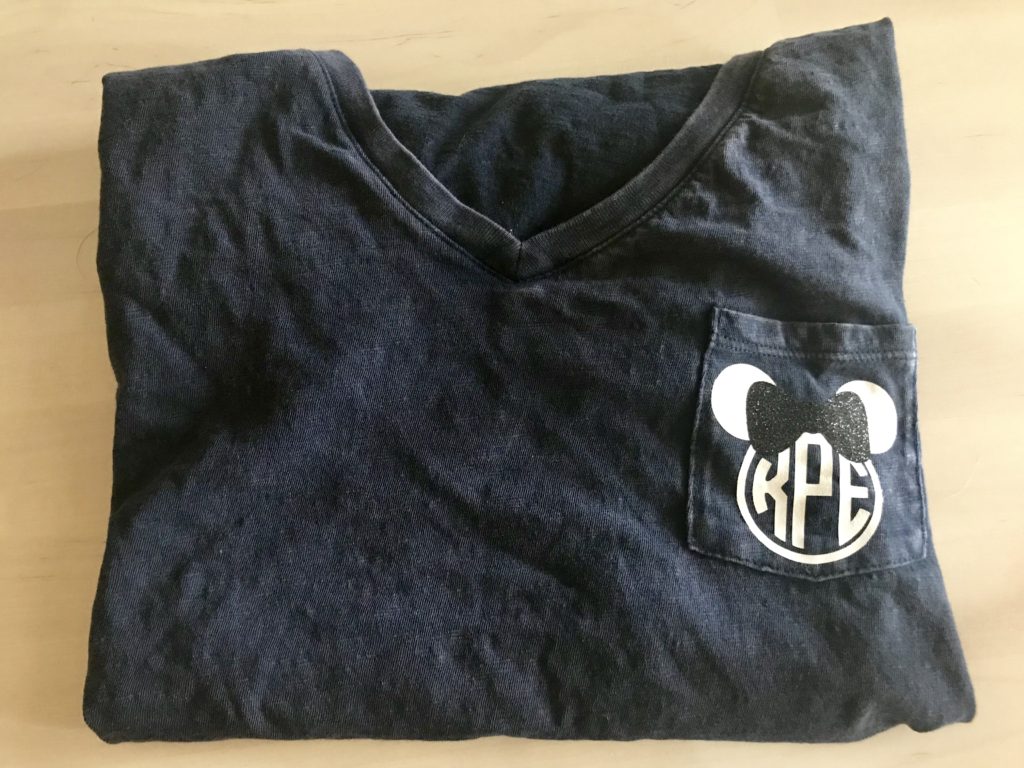
Now you have an adorable Pocket Minnie Monogrammed shirt! We’d love to see your designs too! Comment below on how your project turned out. For more Disney, including park tips, make sure to check out our other posts!