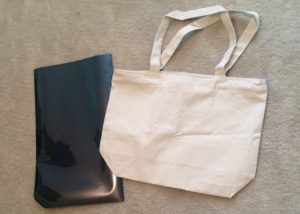
 A good tote bag is a summer essential. Something that can get wet, easy to carry and can hold all your pool, beach or lake items. For our honeymoon I needed a beach bag that I could use around the hotel to take towels, sunscreen, phones, books and such to the pool or beach. I found this canvas bag on Amazon for $6.00 and thought it was perfect to personalize with some iron-on vinyl. **This post contains affiliate links. If you make a purchase after clicking on one of these links, we will be compensated. We actually purchased and used all products endorsed and all opinions are our own.**
Items Needed
- Cricut or Die cut machine
- Font of your choice
- 12 x 20 Black Iron on Glitter Vinyl – I purchased from Expressions Vinyl
- Cricut Tools
- 12 x 24 Cricut Cutting Mat
- Iron
- Surface to Iron On
- Towels or heat barrier to protect surface and vinyl
- Measuring Tape or ruler
 Instructions:
This is a super simple Vinyl project that has no layering or special designs. If your tote is washable, you will need to pre-wash the bag and then lightly iron any wrinkles out. This will get any chemicals from the plant off the tote and allow any shrinkage to happen prior to you placing on your vinyl.
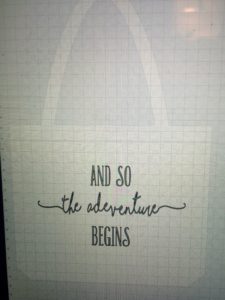
Open up Cricut Design Space and start a new project. Set the background canvas to a bag, so you can see roughly what your finished outcome will be while you work. You will only need three text boxes for this project. In the first text box, type AND SO in capital letters. I used the font EASTON available with Cricut Access. In the second write the adventure in lowercase letters. For these two words, I downloaded Shoreline from dafont.com, which is my current favorite font. (This font is for personal use only, please respect the designers wishes.) To make the lines on either side of the words in this box use the / symbol on your keyboard. In the third box, write BEGINS again in capital letters in the font EASTON.
If you want the font shoreline to look like script and the letters to be attached, detach the letters in the text box and then move them together so each letter touches the next. Then weld the image together. The final design should look something like the photo below.
Once you have your wording the way you like it, use a measuring tape to measure the size you’d like your finished words to be. Resize your text boxes and welded image to the correct size and now you are ready to cut! Click cut on your computer and set your Cricut dial to Vinyl. MAKE SURE MIRROR IMAGE IS CHECKED ON YOUR COMPUTER BEFORE YOU START THE CUT!!
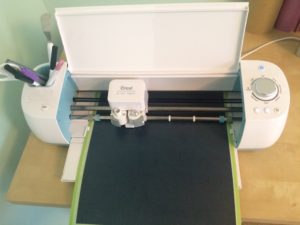
 Place your iron on glitter vinyl shinny side down on the large Cricut cutting mat. Load the cutting mat into your Cricut. Double check that mirror image is selected and that your dial is set to vinyl. Click go on your computer and the cut button on your machine.
After the cut is complete peel the vinyl off the cutting mat. Then peel the vinyl you won’t be using off the backing. The backing on the iron on vinyl from Expressions Vinyl is like transfer tape. You want to leave only the section you are going to iron onto your tote bag on the backing.
Preheat your iron to the correct setting for the iron on glitter vinyl and do not have water in the iron for steam. You cannot use any steam with the iron on vinyl. On my iron I use setting 5 or 6 for glitter vinyl, every iron is different and you may need to play around with the setting to get it right. Start off cooler and increase the heat if you are worried. Expressions Vinyl does have heat settings listed on their website you can check.
Before you begin to iron, lay a towel down on a hard surface, such as a countertop, that can withstand some heat. I use my kitchen counters instead of an ironing board. Place your tote bag on top of the towel. Line up your iron on vinyl on top of the bag with the shiny side up and the sticky side of the backing down on the bag. You should be able to read your vinyl words through the backing. The backing is a little sticky, but you can move the vinyl around until you get the placement correct.
Place a second towel or a heat barrier sheet such as oven paper on top of the vinyl backing and then press your iron down firmly for 10-15 seconds at a time. Repeating until all the letters are firmly adhered to your tote bag. Check if your letters are attached by SLOWLY pulling off the backing. If a section is not fully adhered iron again. Once every letters is fully adhered remove the backing. Place the heat barrier or towel down again and iron over the whole tote bag. 
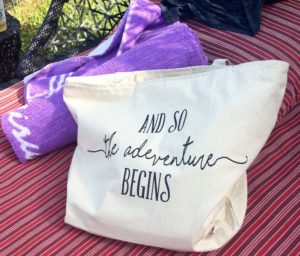
Now you have a honeymoon ready bag for the pool, beach or wherever your travels take you! If any section ever starts to peel up, simply iron over it again!
For more information and about the products I used for this project visit these affiliate links:
Sign up for Cricut Access™ and get unlimited access to images, fonts and projects
Cricut Explore Air™ Machine + EVERYTHING Starter Set
Click Here To Visit Expressions Vinyl

