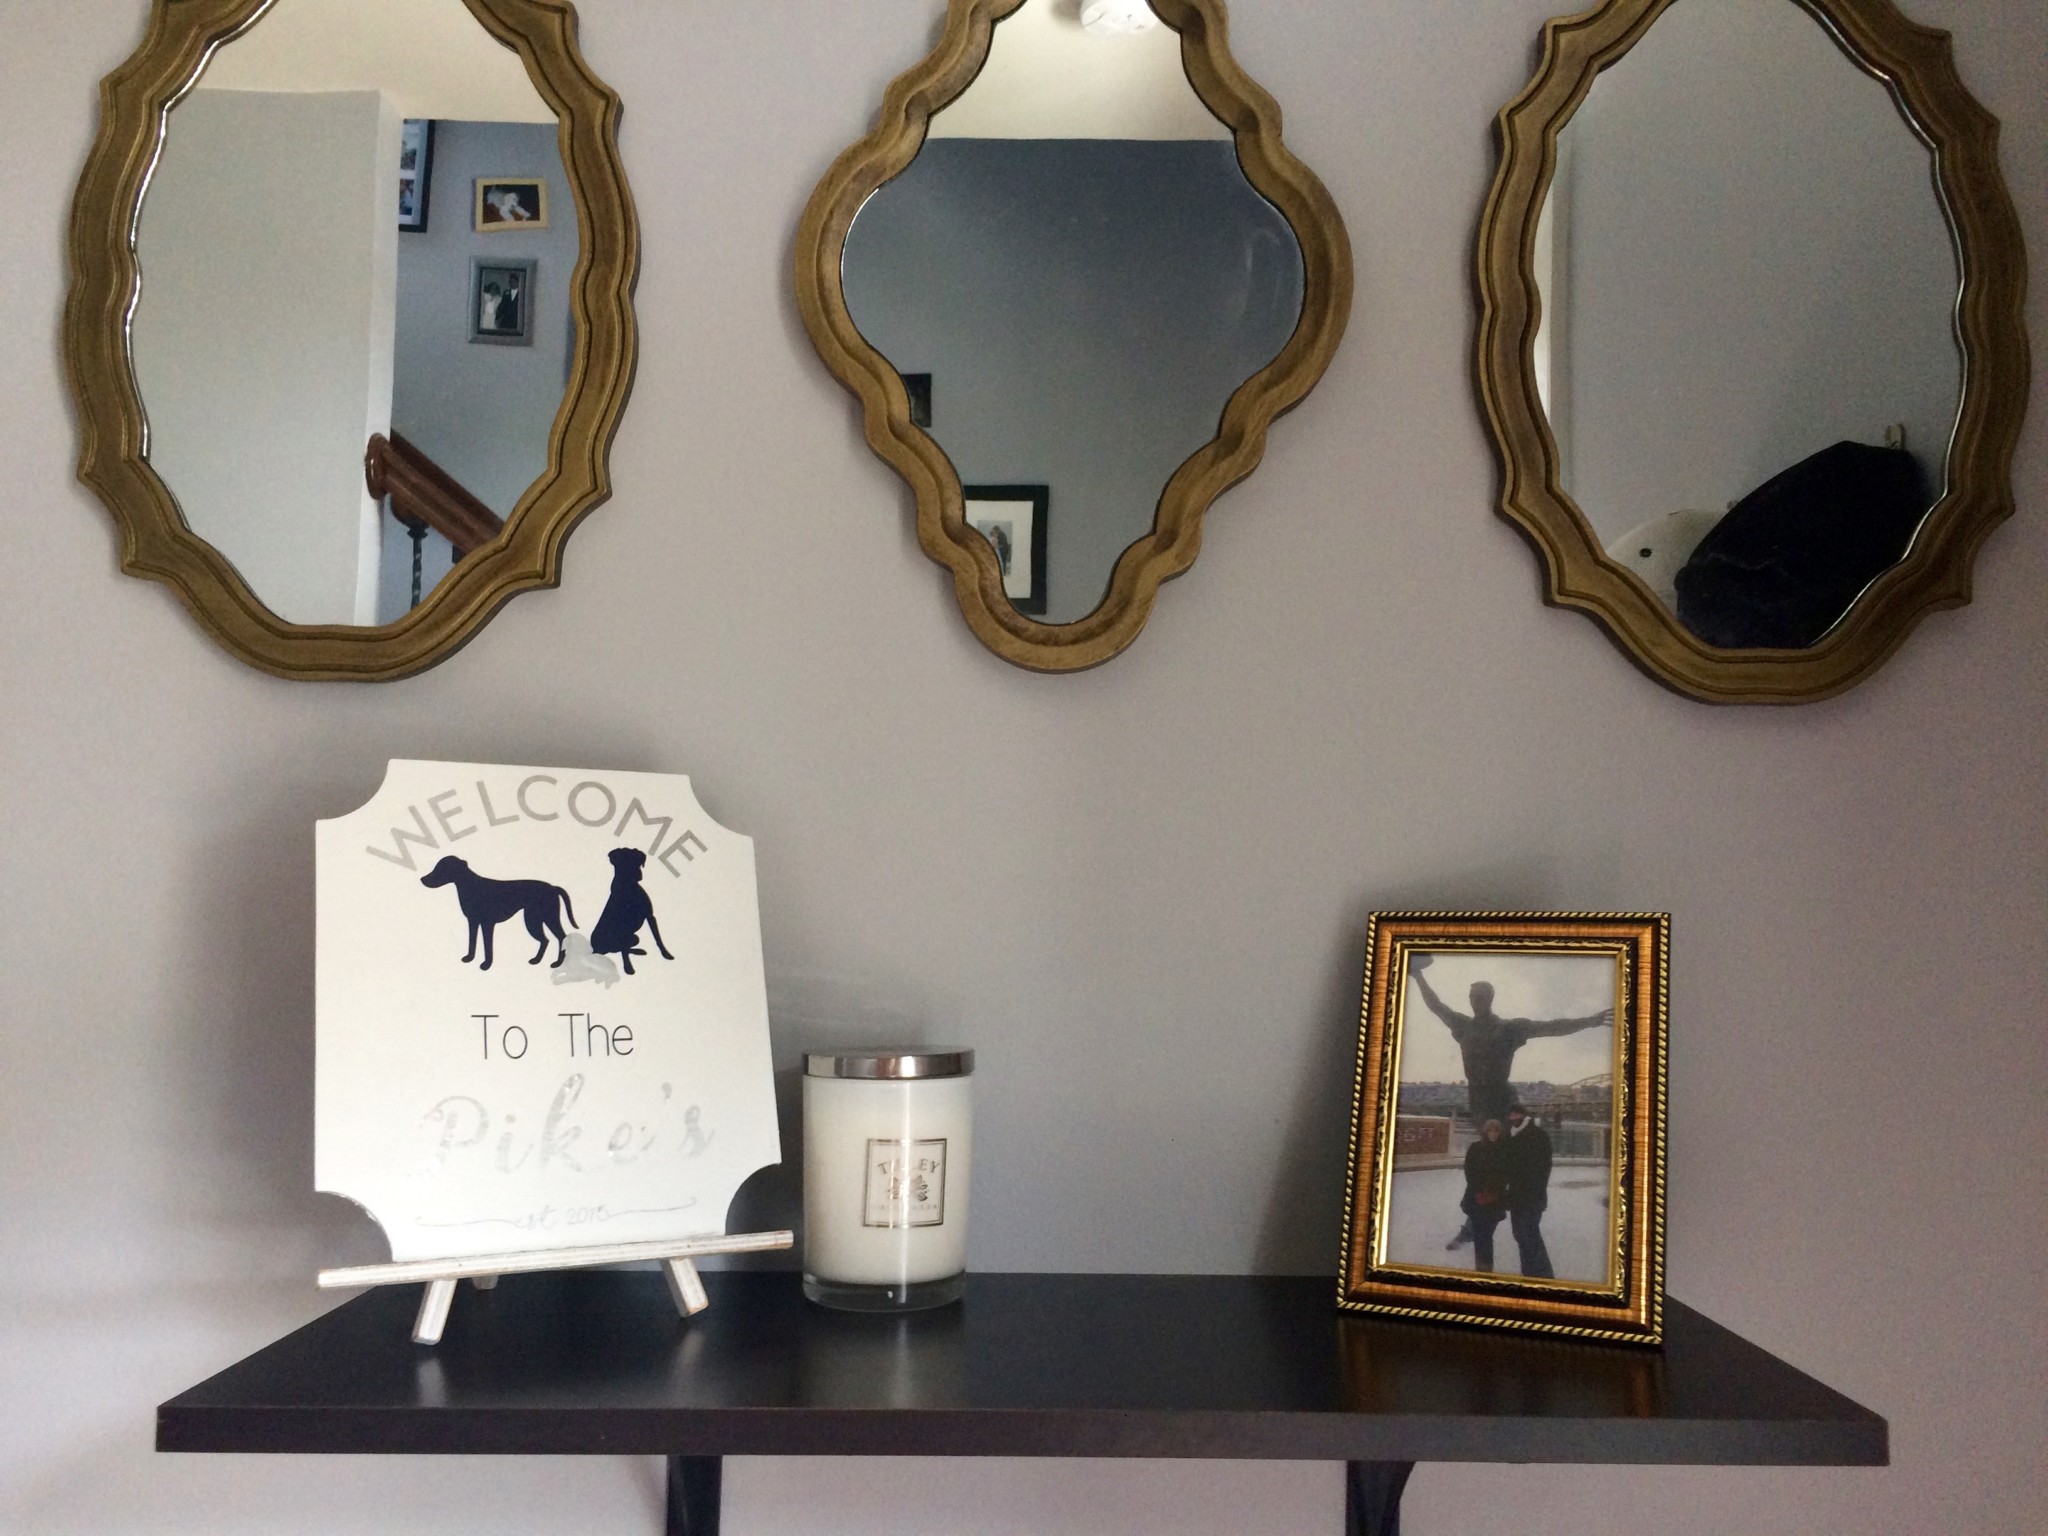
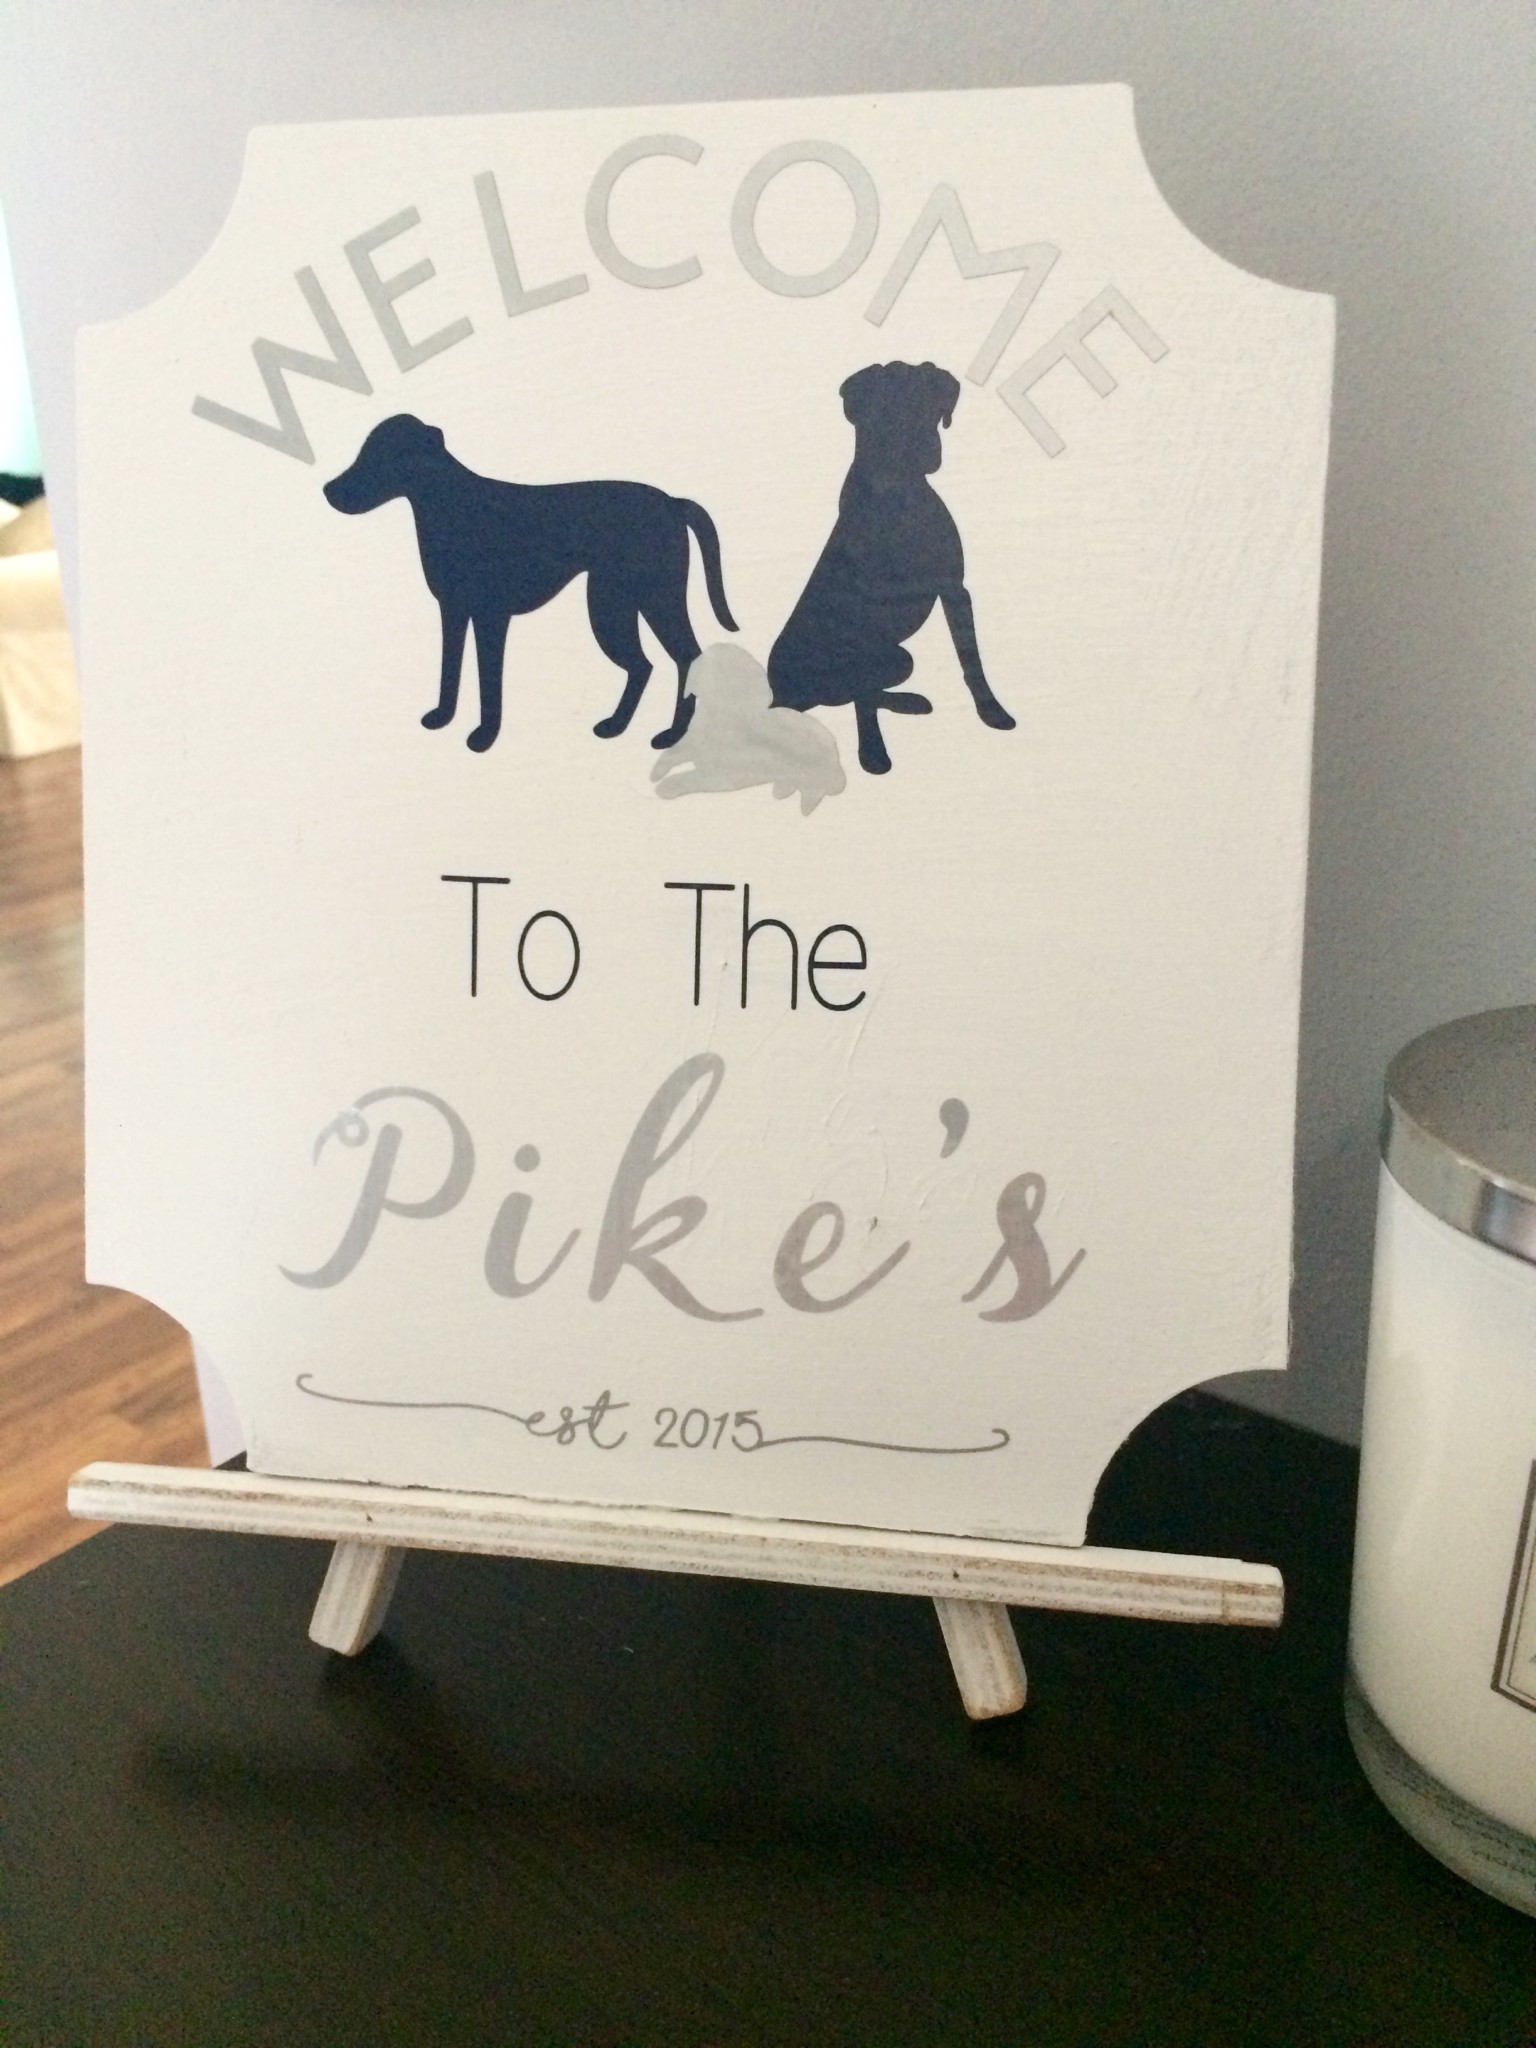
Our dogs are family and when figuring out a way to fix a DIY Welcome Sign for our entryway that was a total fail, I couldn’t leave the pooches out! I got the idea to add silhouettes that looked like our three dogs and make this adorable welcome sign. A custom welcome sign was the perfect way to complete our entry and is such a cute way to greet guests. I’m a huge fan of contrast, so our entry has a mixture of gold and silver. The sign I made has a gray background with metallic silver and navy vinyl and silver foil. **This post contains affiliate links if you make a purchase after clicking one of these links, we will be compensated. All opinions are our own.
Items needed for this project:
- Cricut Die Cut Machine
- 2 – 12 x12 Pieces of Vinyl – Expressions Vinyl
- 1 – 12 x12 Piece of Metallic Silver Foil
- Cricut Design Space
- Cricut Tools
- Cricut Cutting Mats
- Small Sign
- Paint
- Paint Brush
You can find all of these items at JoAnne’s, Michaels or your nearby craft store or online!
The Sign Before:
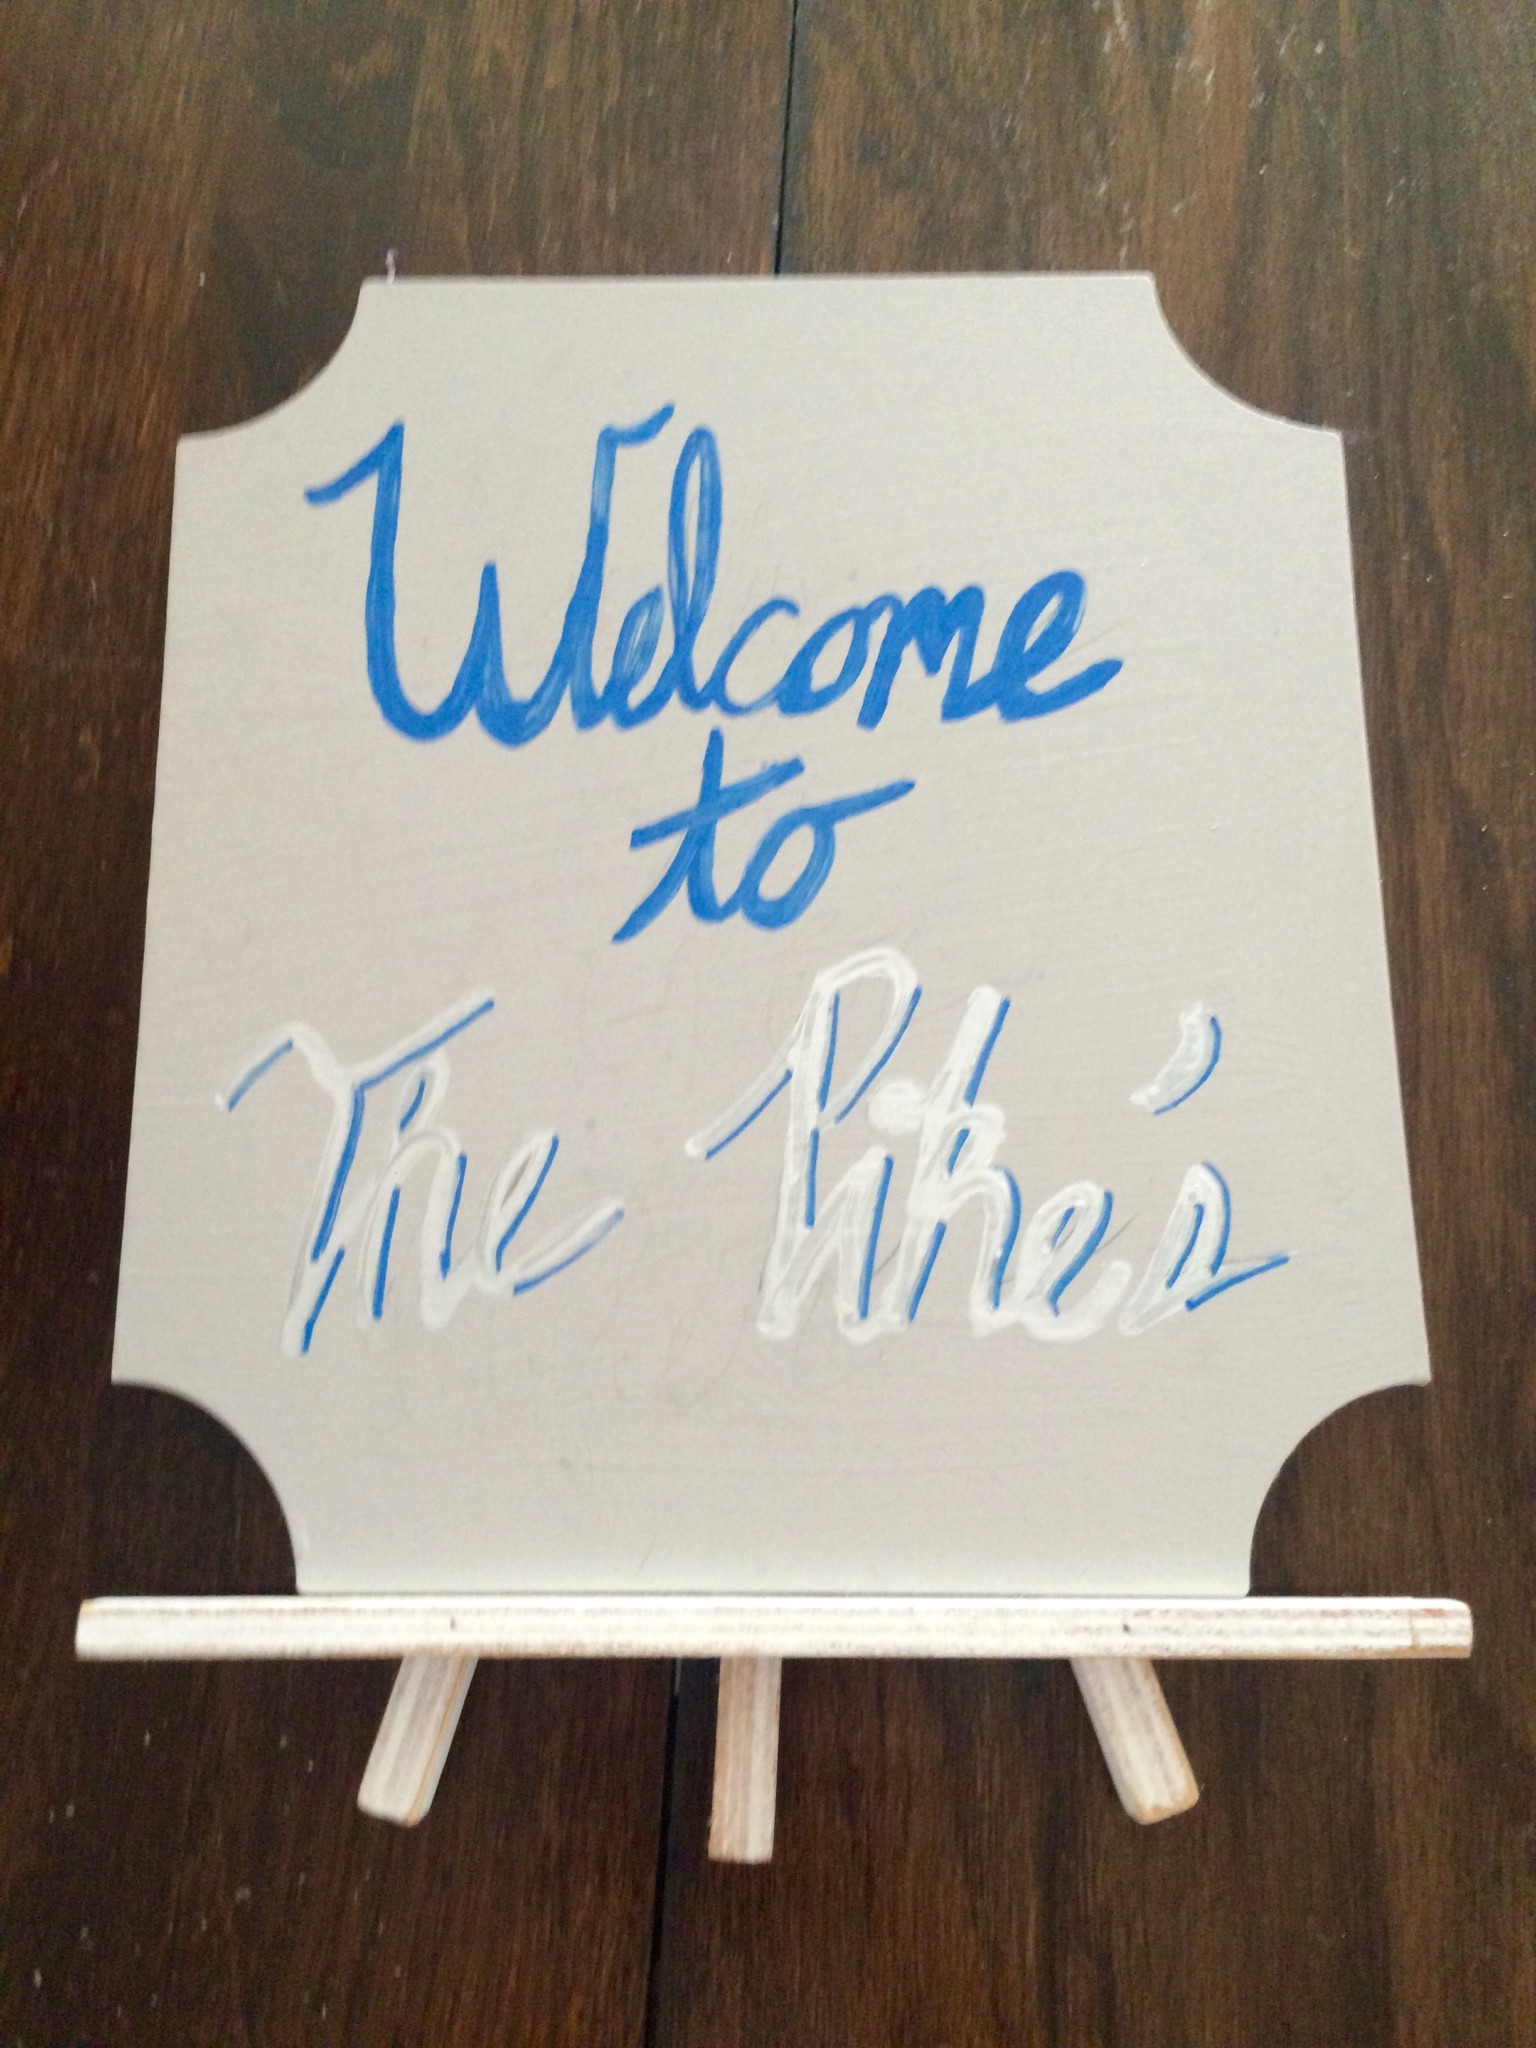
Here was the hideous sign before. I purchased the blank sign on sale from Michael’s and wanted to use it in our wedding for a drink menu. I wound up framing a typed up drink menu since that fit our wedding decor better, but I still wanted to use this sign for something. When we moved I needed some decor in our entry and thought a welcome sign would be perfect. A bad paint pen experience later and the sign was not what I intended it to be. I lived with it for a few months, until I came up with this much cuter design and used vinyl letters instead of paint pens to make it perfect.
Start With a Clean Slate… or Sign
I painted over my horrible hand writing to make a clean slate with gray paint from one of the rooms in our house. Typically I wouldn’t have used wall paint, but the spray paint can I intended to use happened to be empty and ironically the wall paint was the same color. Not a go to paint choice, but hey it worked and I didn’t have to buy anything extra.
The Sign Design
After two coats of paint, I had a blank canvas again. I went inside and started my design on my Cricut Design Space while the paint dried. Cricut Design Space is amazing. I love the design space because I feel like I can create anything using it. There are so many options for images to import, like the dog silhouettes, and if I can’t find what I’m looking for I can upload my own designs. Etsy, is another great resource. Thousands of graphic designs are available for purchase and download in one click.
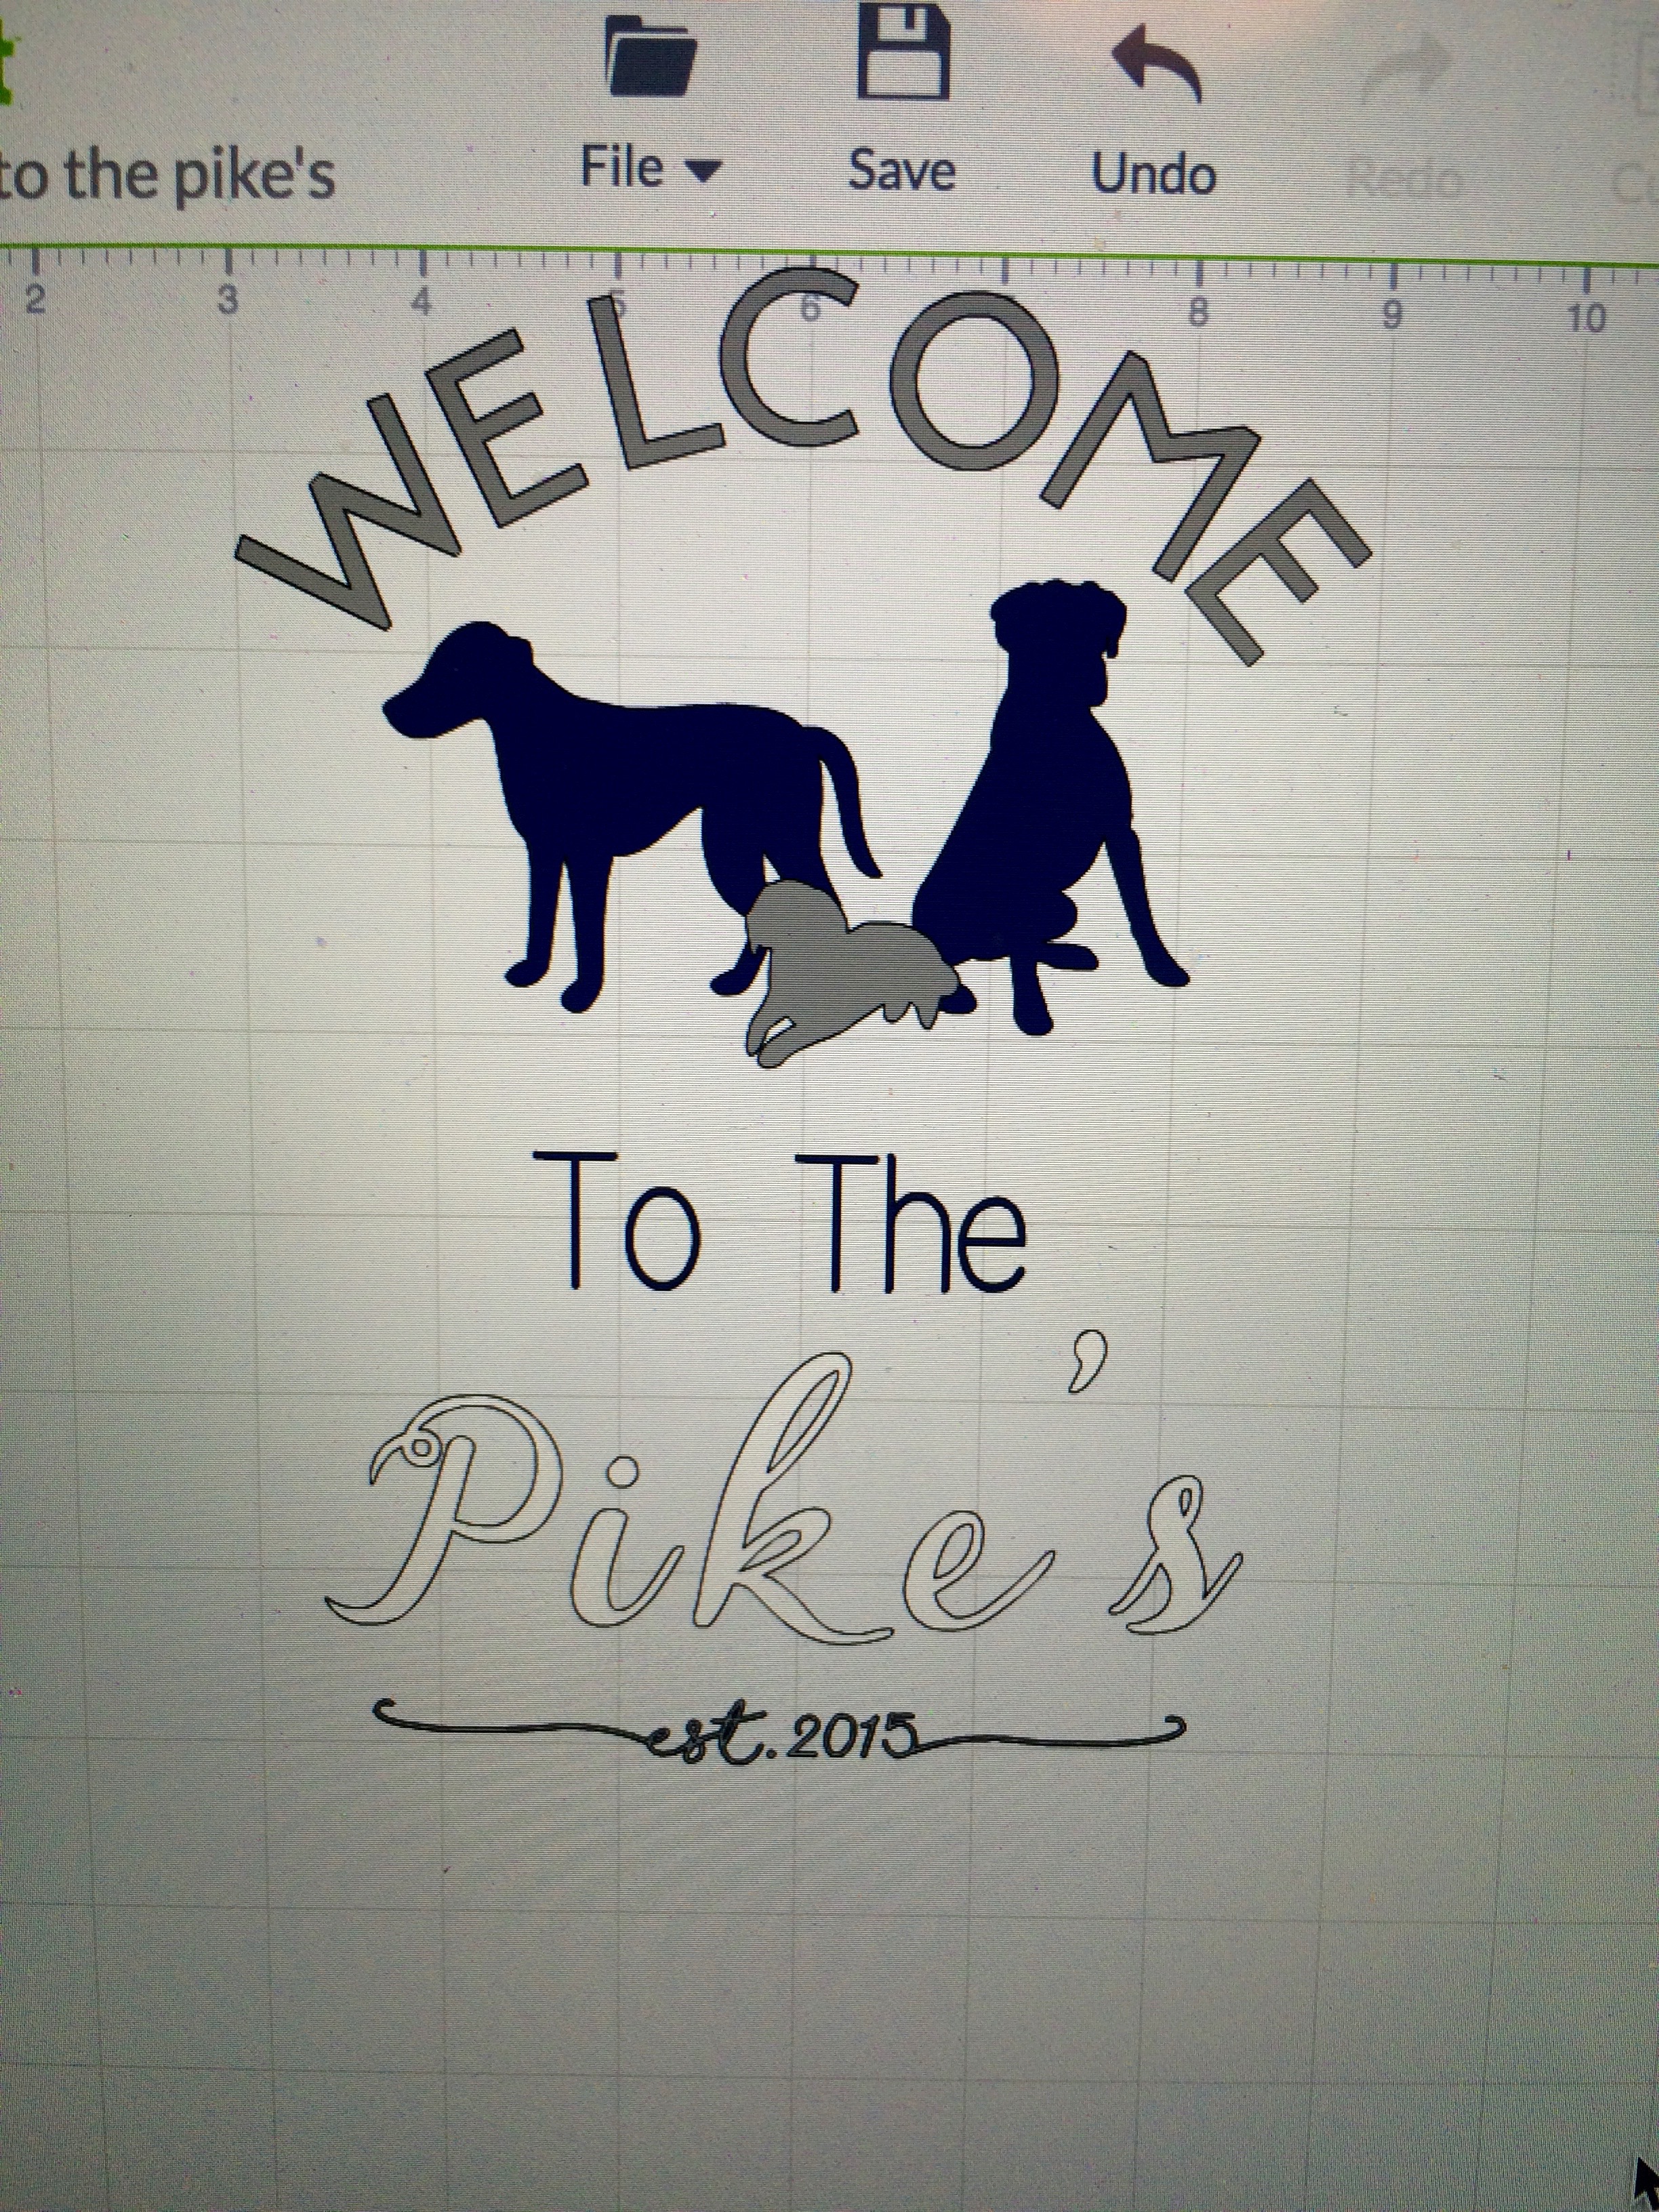
Design Your Own Sign Using Cricut
I made the design by opening up a text box and typing out individual letters for the word welcome around a circle and rotated each letter around a circle until the word looked curved. Then I added the three dog silhouettes that looked the most like our dogs underneath. In another text box, I typed out To The. I added a third text box for our last name and a fourth for the year we were married. The welcome, smallest dog and establish line are all in a silver gray vinyl, the larger dogs and To The line are in navy and our last name is silver foil. A great place to get fonts is dafonts.com or Font Bundles. They offer free fonts and fantastic bundles from various designers.
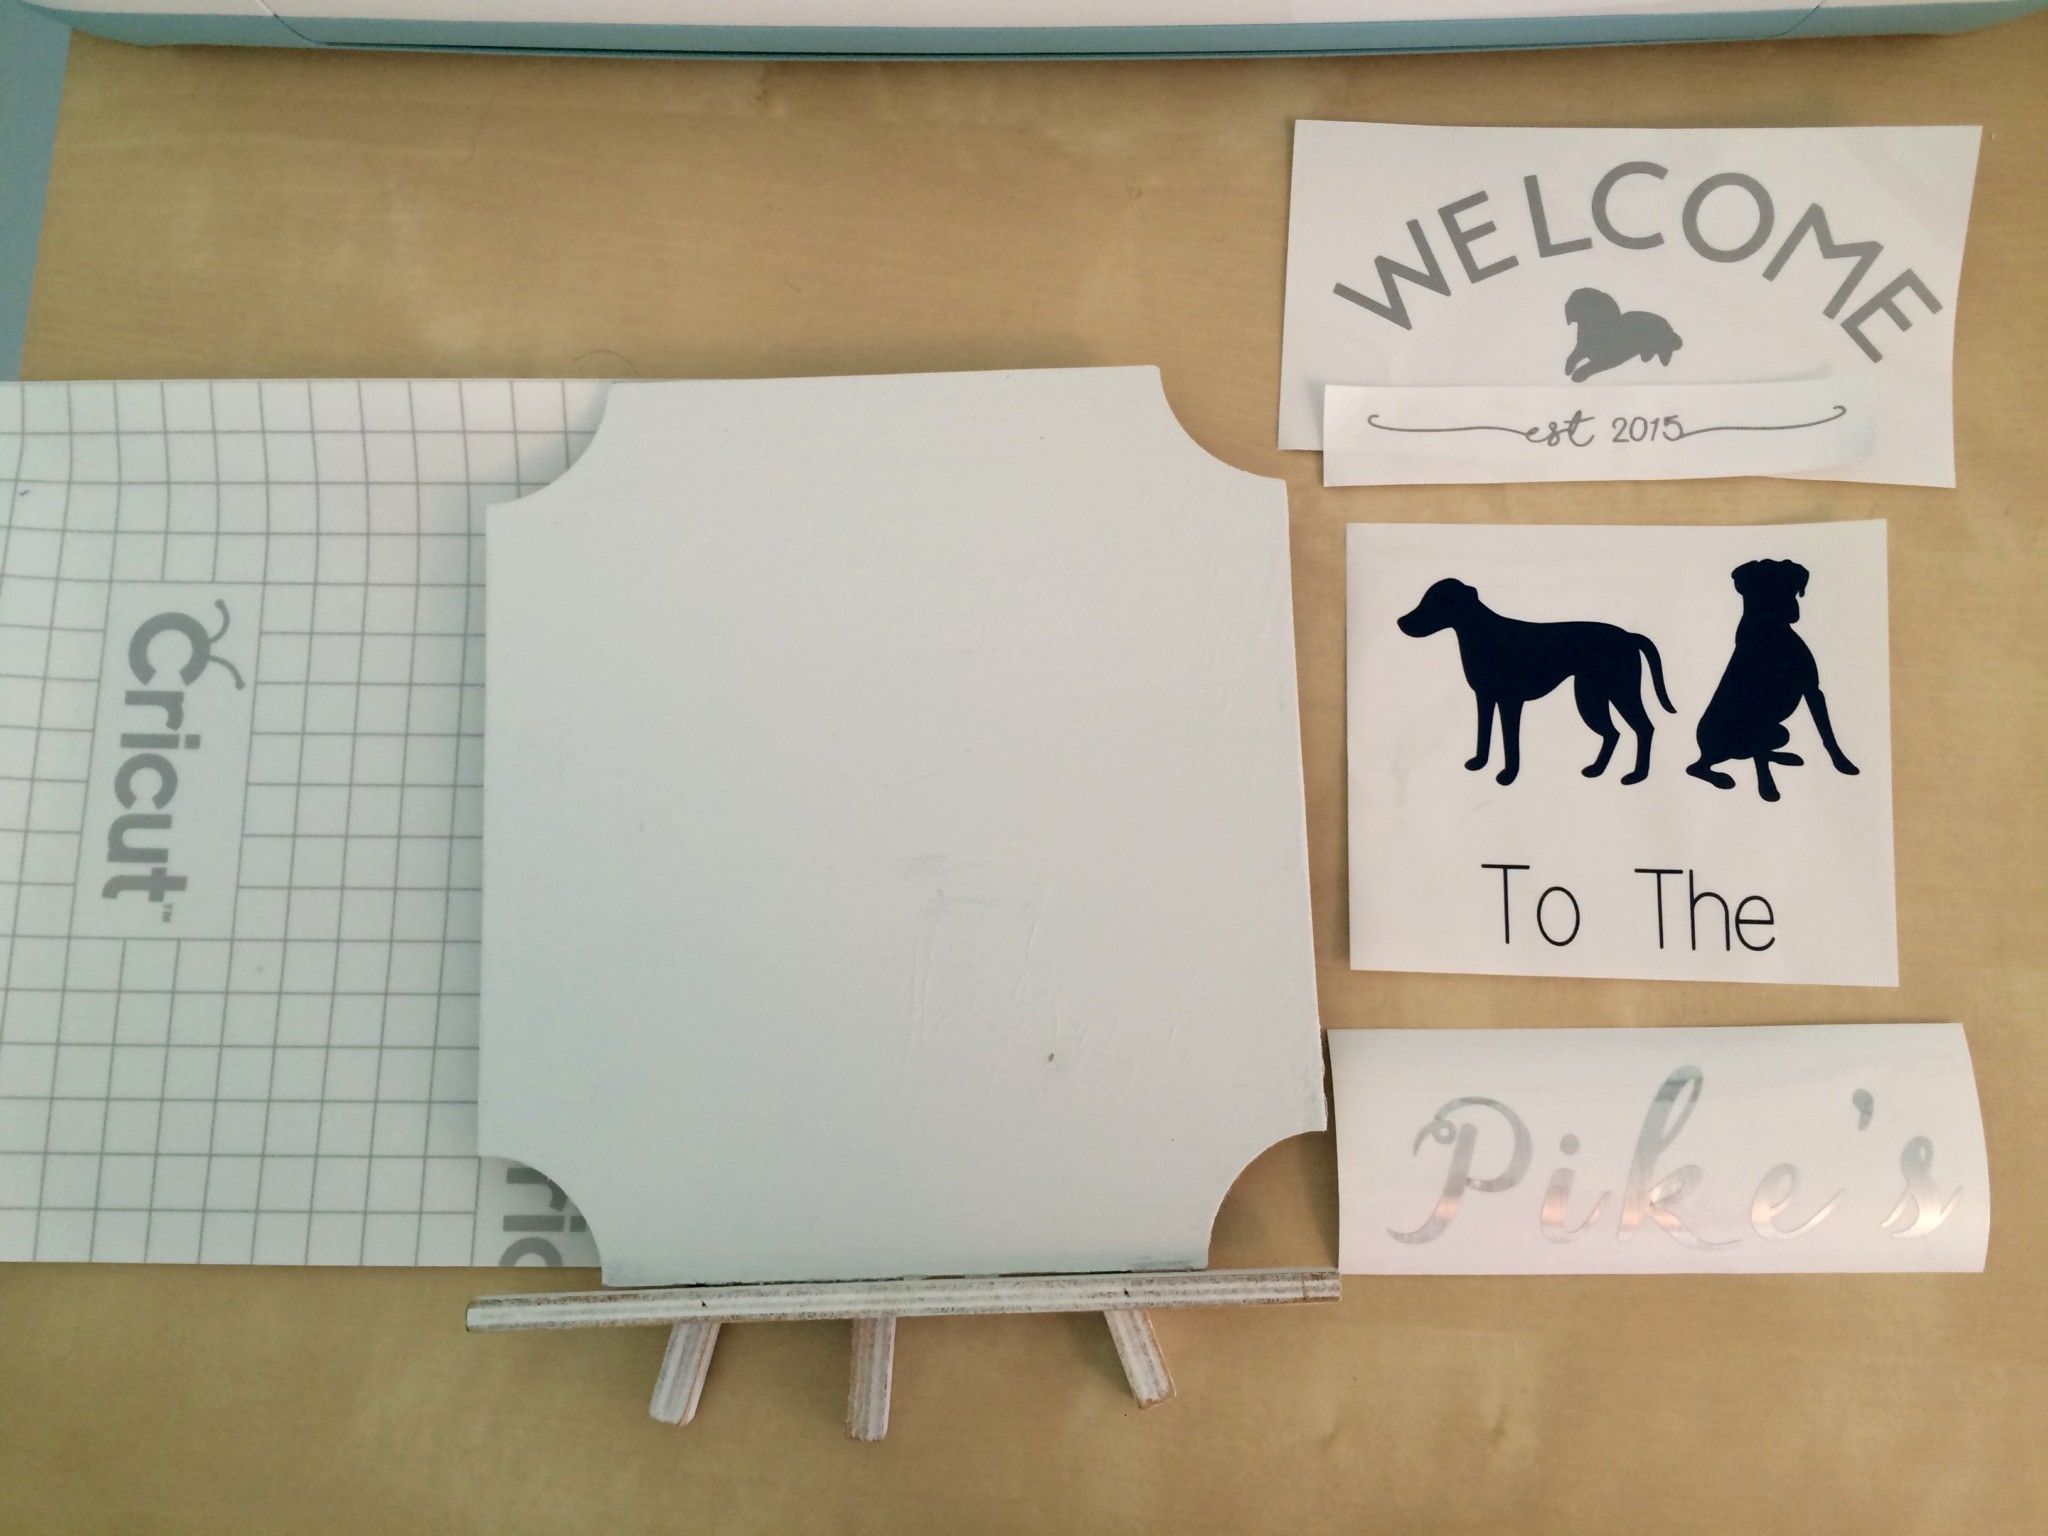
Cutting Vinyl Using Cricut
Once your design is the way you like it, it’s time to cut! Click cut on your computer and set your Cricut dial to Vinyl. Place your first color vinyl shinny side up a Cricut cutting mat. Load the cutting mat into your Cricut. Double check that your dial is set to vinyl. Click go on your computer and the cut button on your machine.
Attaching the Vinyl To Your Sign
After the cut is complete peel the vinyl off the cutting mat. Then peel the vinyl you won’t be using off the backing. You want to leave only the section you are going to use on the backing. While you are doing this you can load your second color vinyl. Repeat those steps and then load the vinyl foil last. Make sure you set your machine to cut the foil per the directions on the foil packaging. After your cuts are complete, line up all the pieces so they look like you want them to on your finished sign. Pick the vinyl pieces up using the transfer tape in the way you want them to line up on your finished sign, see the photo below.
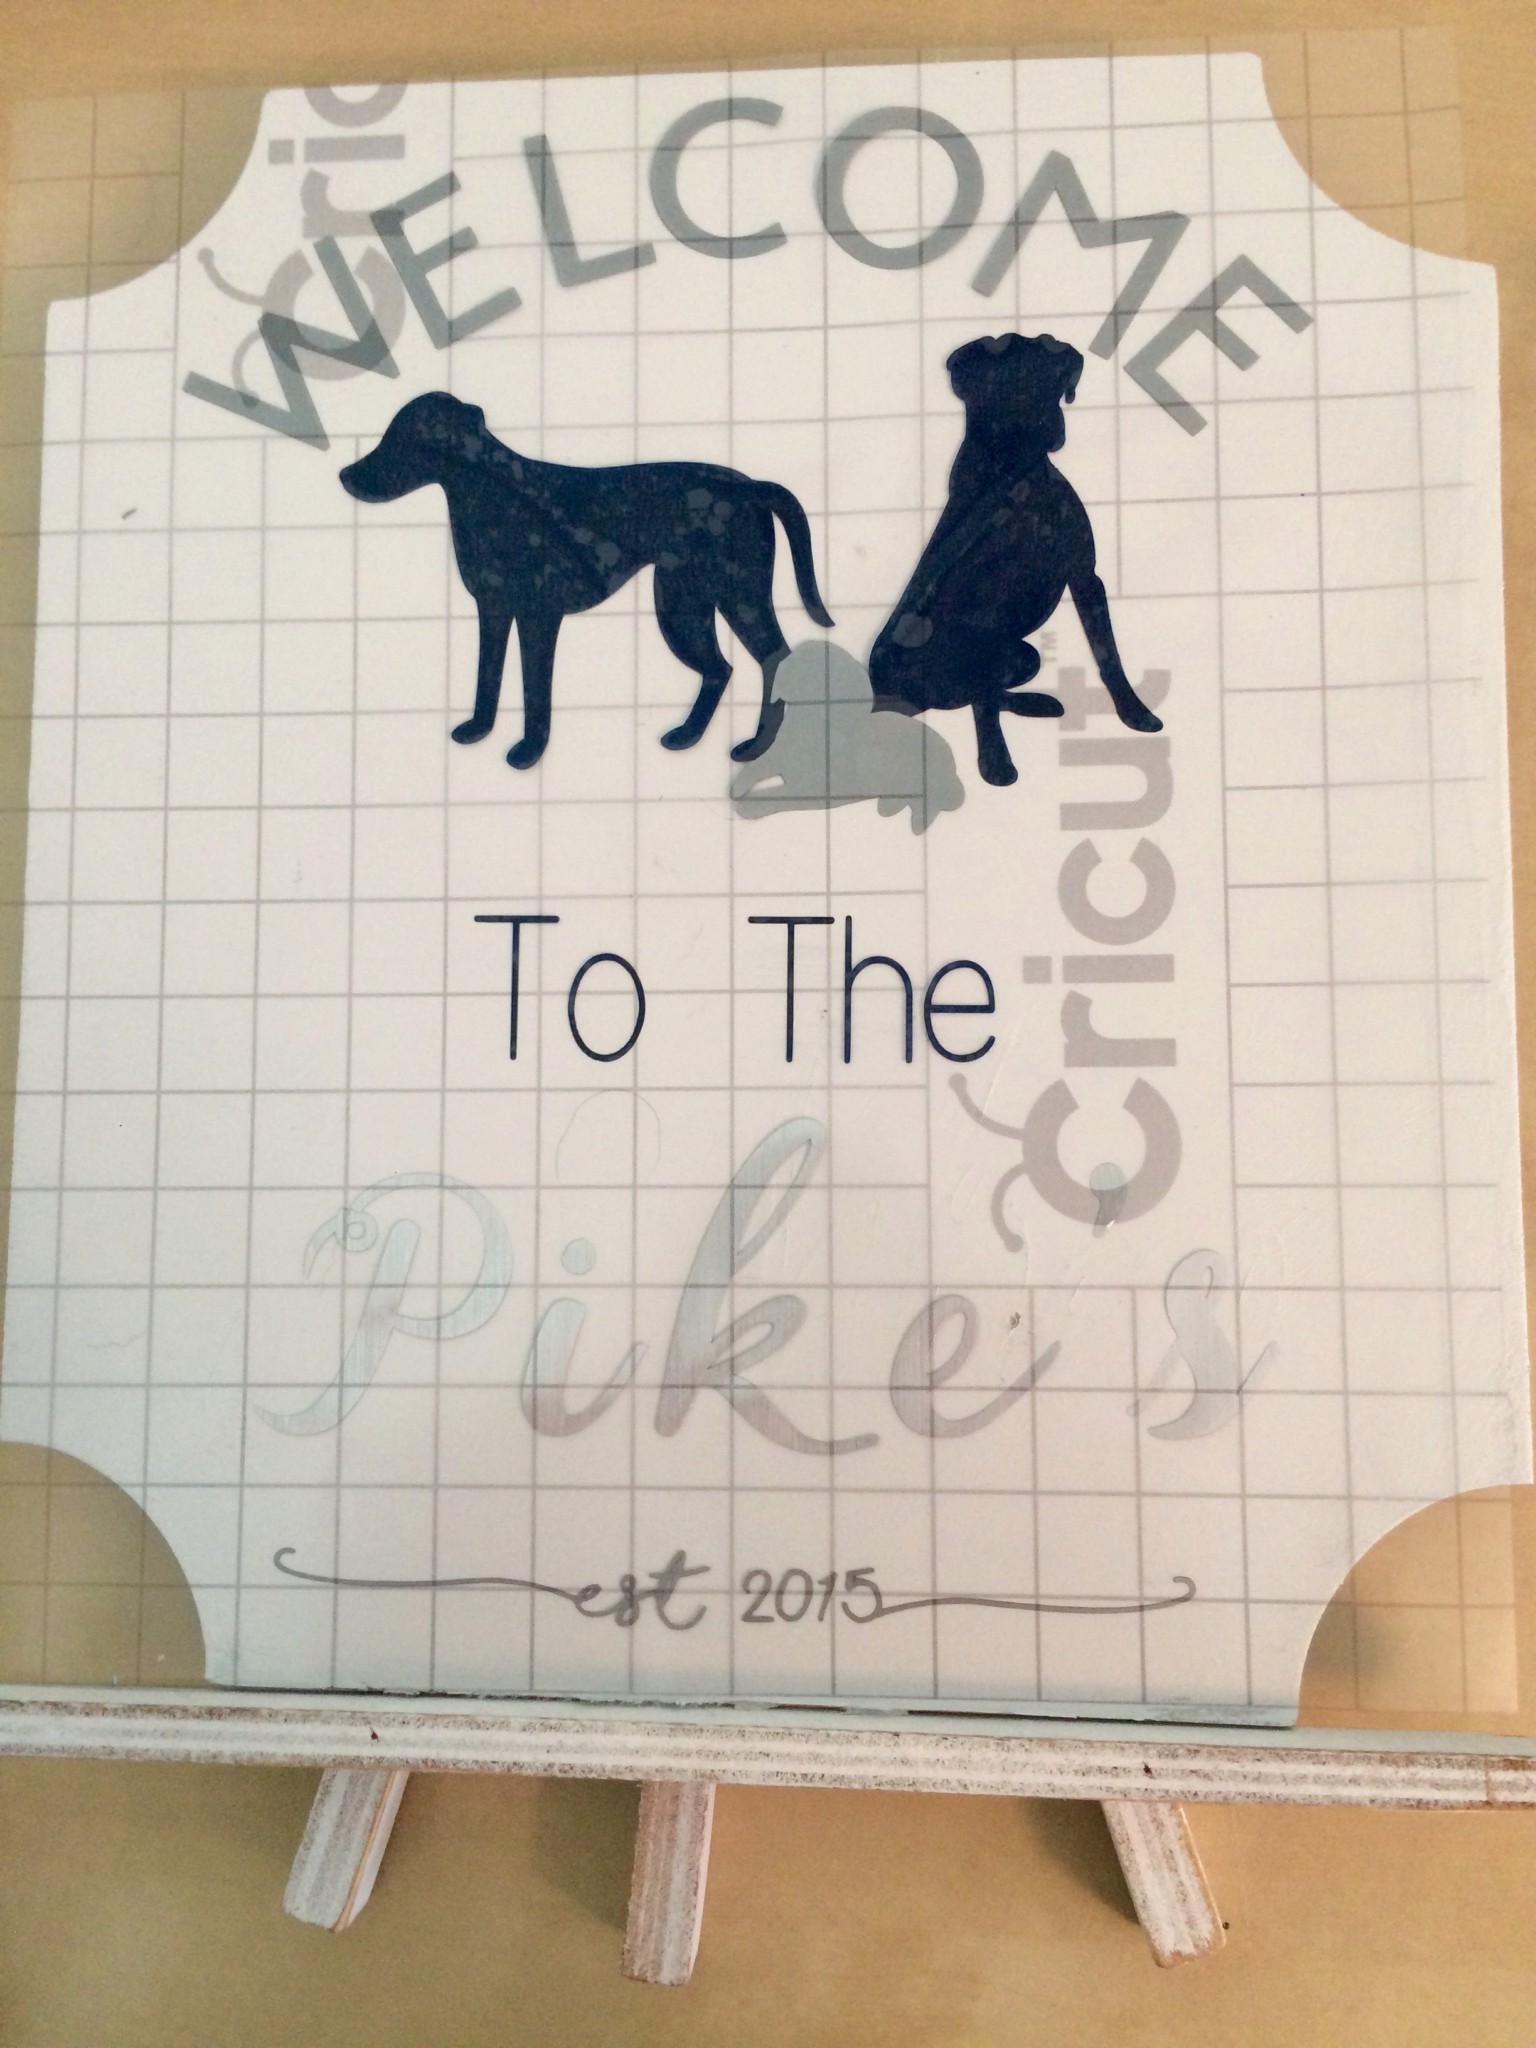
Then press the transfer tape down and use the Cricut scrapper to really press the vinyl onto the sign. Carefully peel up the transfer tape off the sign and make sure all the pieces of vinyl stick to your sign. If you want an extra seal you can spray a light coat of clear spray paint over the the entire design.
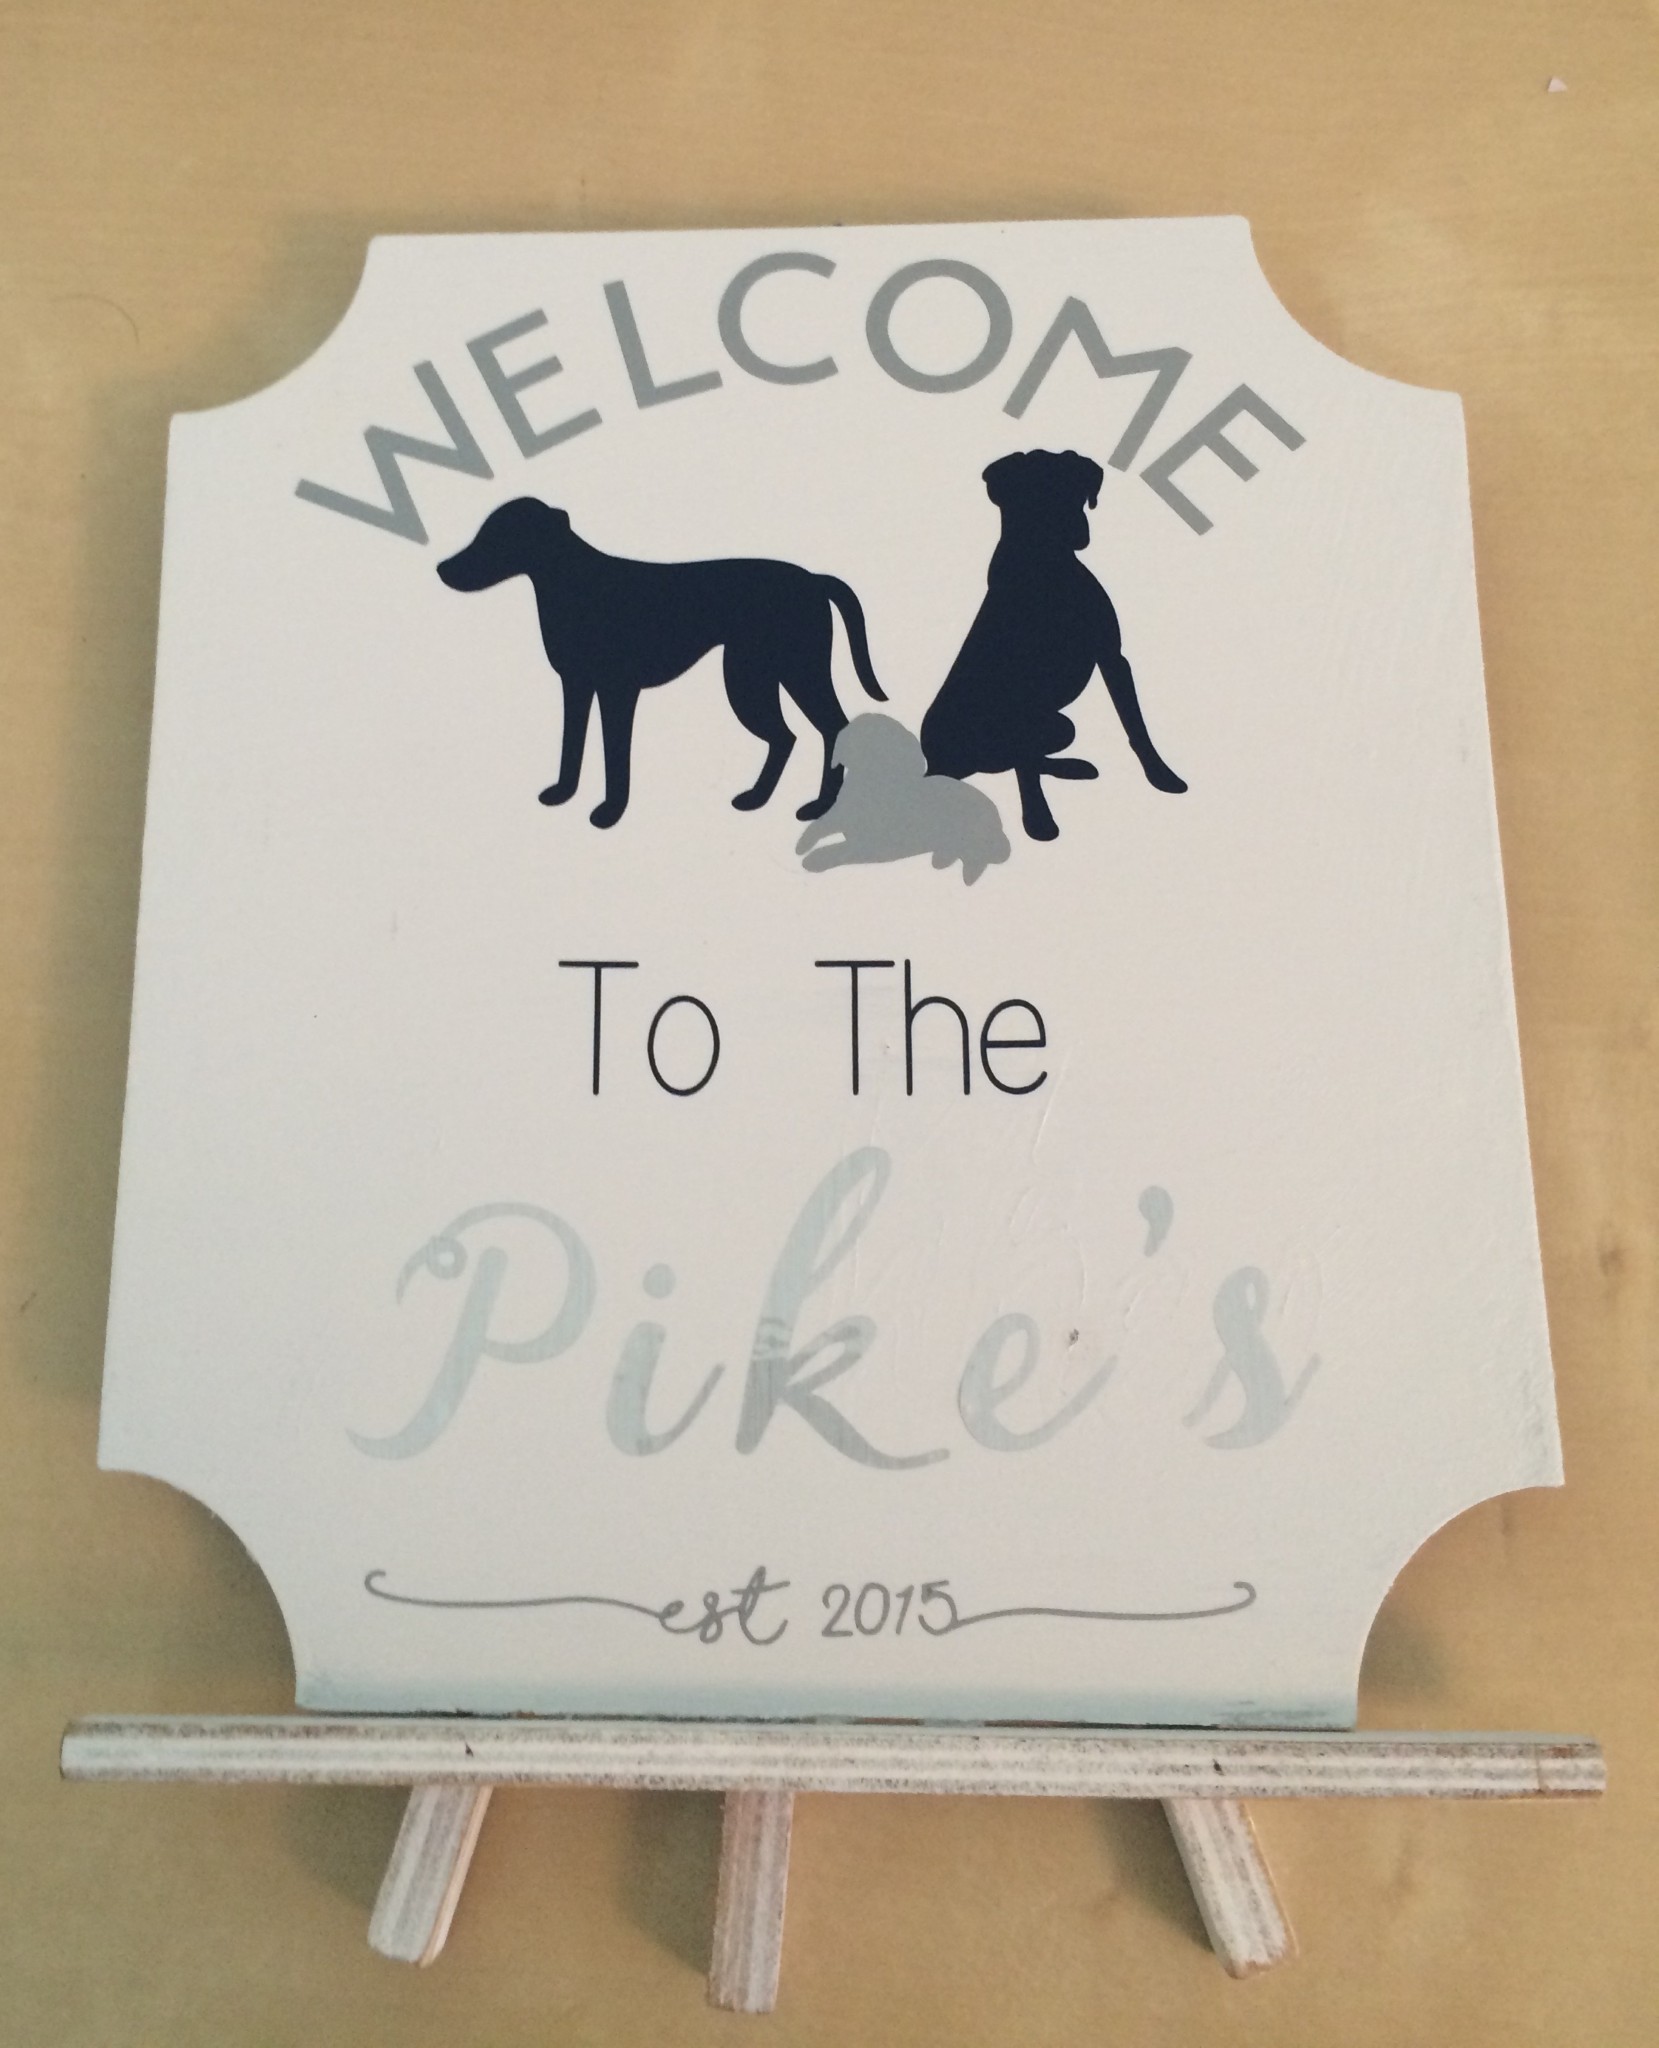
The Finished Welcome Sign
Now you have an adorable sign for your entry way to welcome friends and family to your home. I love this design because you can easily make changes to make it work for your family. If you don’t have a dogs, swap them out for cats or a seasonal item like a sun or leaves. You can personalize this to fit your life!
Find out more about the affiliate products used for this project below


![]()