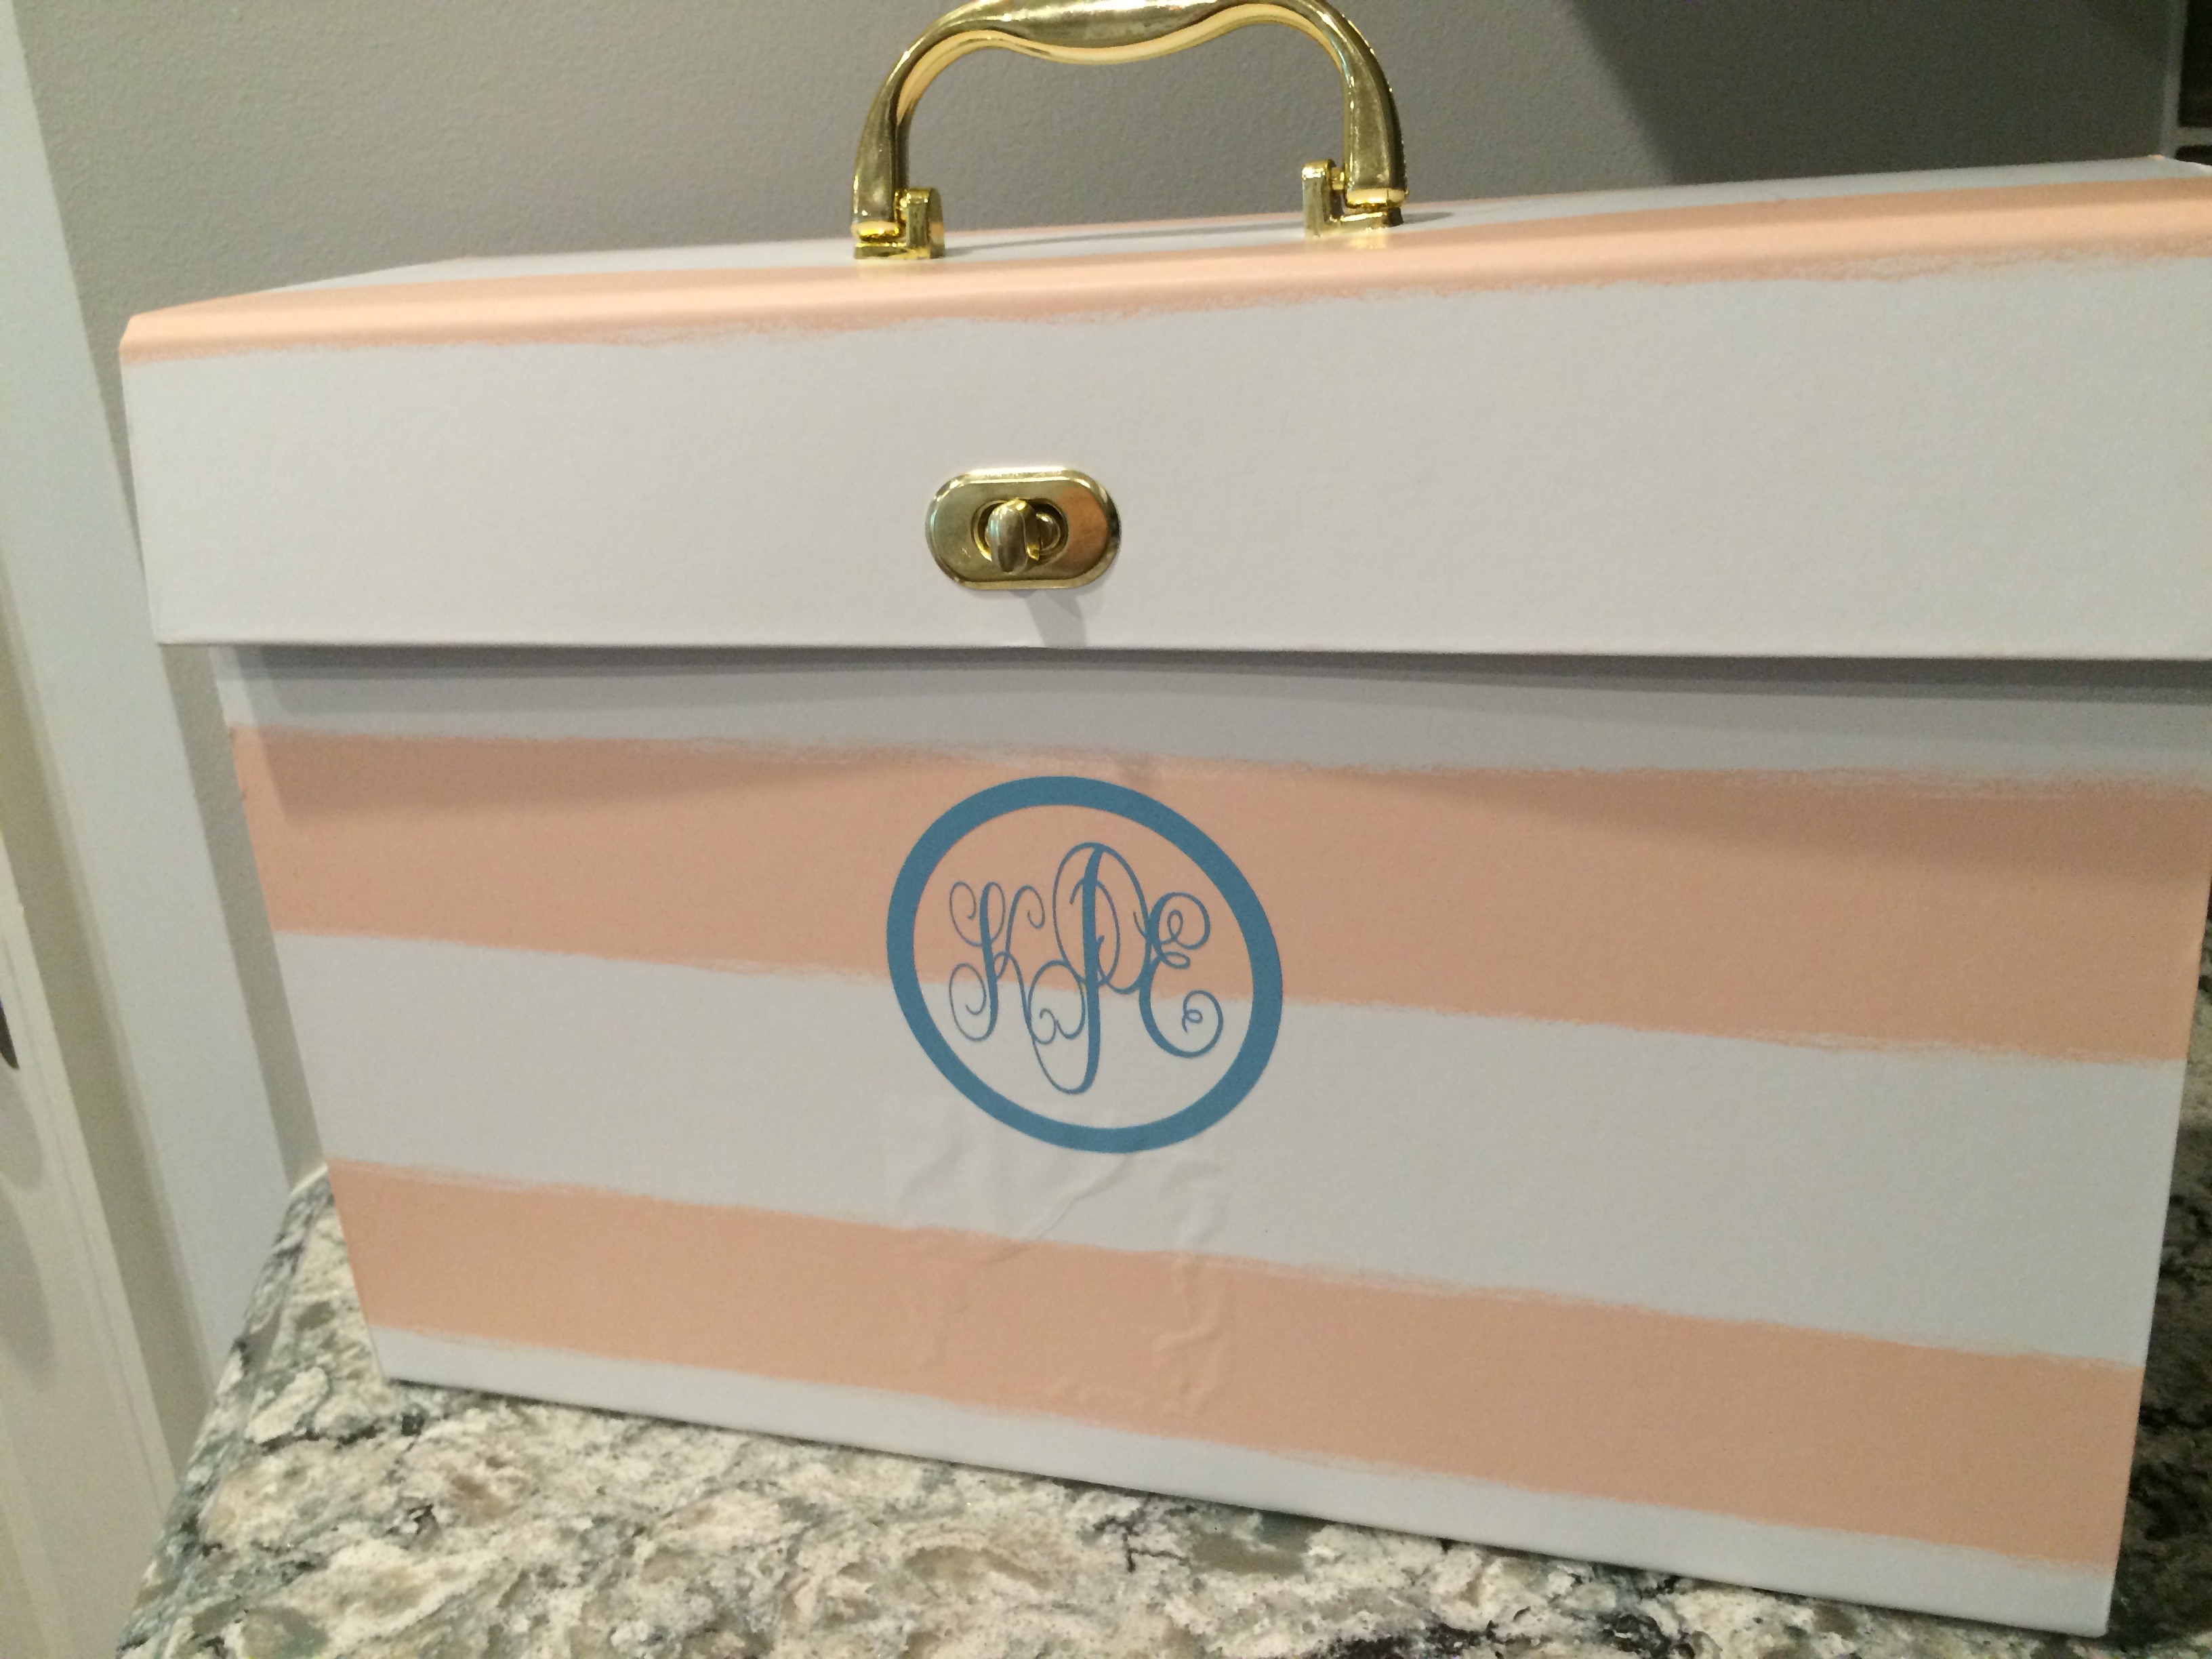
Sometimes I think everything in life should be personalized and after I got a Cricut, I had to test out making my own monogram. I have this file folder I purchased at Target that I use to store extra paper, vinyl, iron on material and other scraps and it needed some personalization to help cover up a weird spot the price tag left. So, I decided to test out my monogram making skills and make my first Cricut vinyl project. This post contains affiliate links to products I use for your convenience and to support the continuance of this site. All opinions expressed are my own.
If you don’t own a die cut machine, you aren’t totally out of luck on this project. There are hundreds of vinyl monograms you can buy on Etsy. Of course, I’d rather make my own.
Supplies
Cricut or Die Cut Machine
Cricut Design Space or design program
Vinyl – Powder Blue Oracle 631 from Expressions Vinyl
Transfer Tape – A sample of Cricut transfer tape came with my machine (Works for regular vinyl, but I haven’t gotten it to work with glitter vinyl. More on that in another post)
Cutting Mat
File Folder
Instructions:
These instructions are to make a monogram on a Cricut. If you have another machine or program, I’m sure you can adjust the directions and make a monogram on whatever program and machine you use.
Design The Monogram:
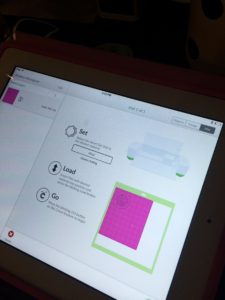
- Open up a new project in design space and start by creating two circles.
- Make one circle slightly larger than the other. Put the larger circle on top of the smaller circle and center the alignment.
- Select both circles and click the “slice” button to create the border of the monogram.
- Delete the smaller circle and place your newly created monogram border to the side.
- Add a text box for each letter of your initials and choose the script of your choice.
- Align the text boxes so that each letter is in a straight line.
- Make the center initial (your last name) slightly larger than the other two initials.
- Then line up them up and center them. It should be first, last, middle.
- Once you have your initials in the monogram shape you like, select all three letters and click the weld button to make sure they stay a unit when you go to cut.
- Place your welded monogram within the circle border you made earlier.
- Drag and resize the monogram to fit inside the circle border and then select and center both images.
- Group the monogram and circle border together and then click the attach button. This will make the machine cut the images together at the same time.
You are ready to cut!
Cut The Monogram:
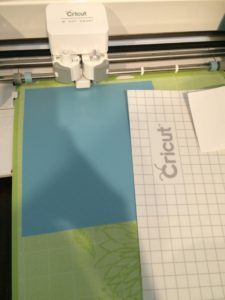
- Click go on the design space and set your machine to cut vinyl.
- Place your vinyl on your cutting mat without peeling any of the backing off.
- Load your cutting board to your machine by pressing the up arrows.
- Click go on the machine and follow the prompts on your computer.
- Once the cut is complete press the arrow button on the machine again to unload the cutting mat.
- Remove the entire piece of vinyl from your cutting board, again without removing any of the backing.
- Trim any of the the extra vinyl away from your monogram. Make sure to save your scraps for other projects!
Attach The Monogram
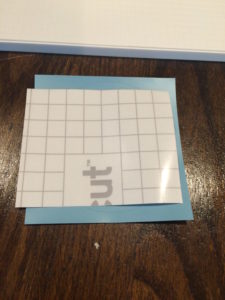
– Cut a piece of transfer tape to roughly the size of your monogram. See photo above.
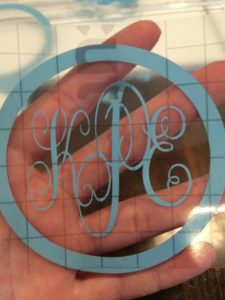
– Now you can peel away the extra vinyl around the monogram. Do not peel away any parts you want to use. See photo below.
– Peel the backing away from the transfer tape and stick the transfer tape to your vinyl monogram.
– Pull the transfer tape off the backing make sure the monogram is sticking to the tape. See photo below.
– Line up your transfer tape to the file folder and once you have the location you like for your monogram press the tape down firmly adhering the vinyl monogram to the folder.
– Carefully pull off the transfer tape leaving the monogram attached to the folder.
Look at your awesome monogrammed file folder for your home or office and you can create vinyl monograms for just about anything in life!
File folder before: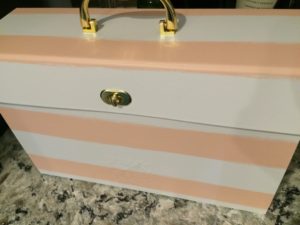
File folder after: